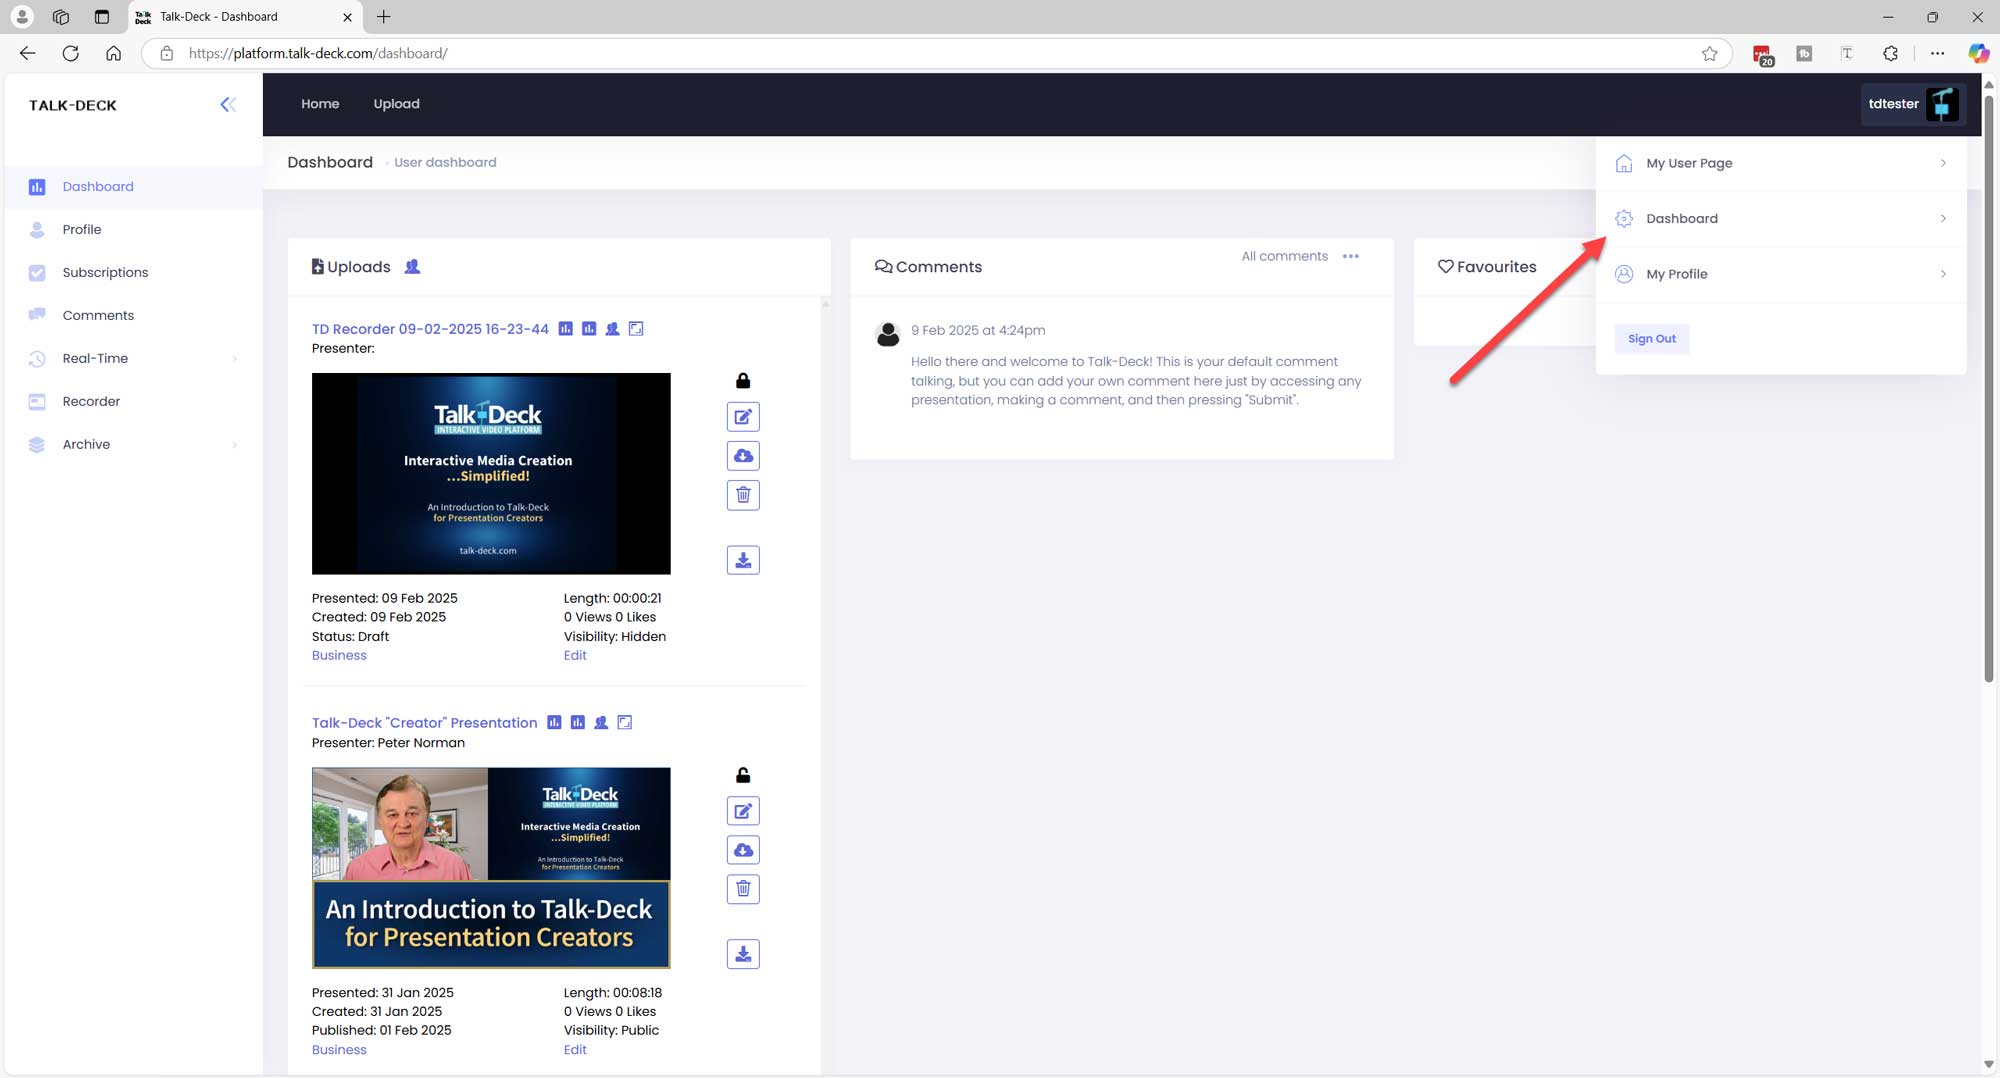
Account Creation and Sign In
Uploading Your Slide Deck

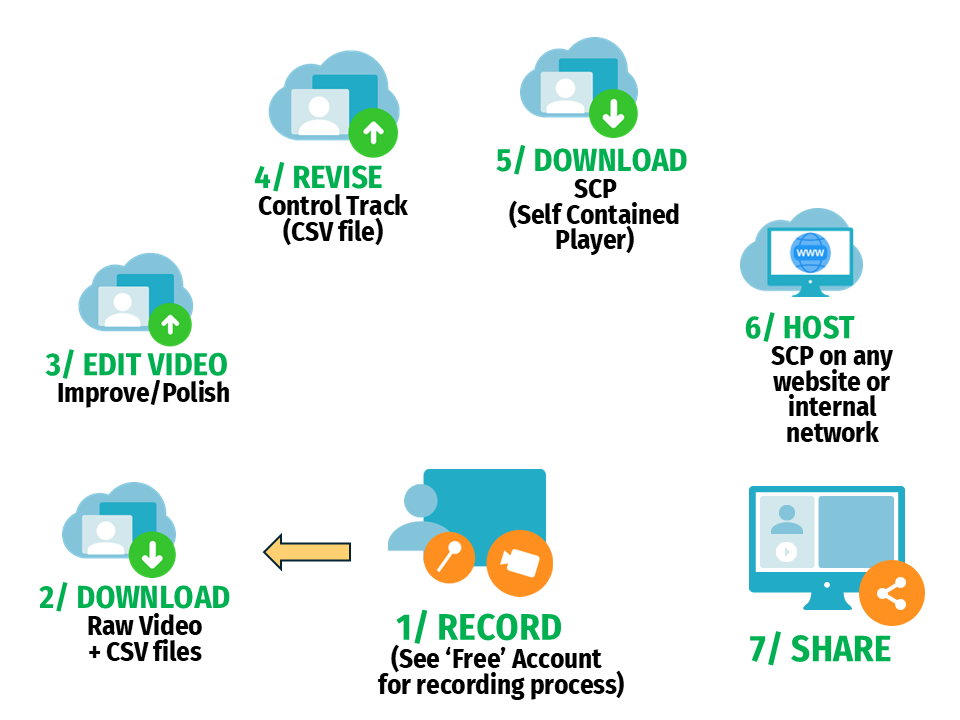
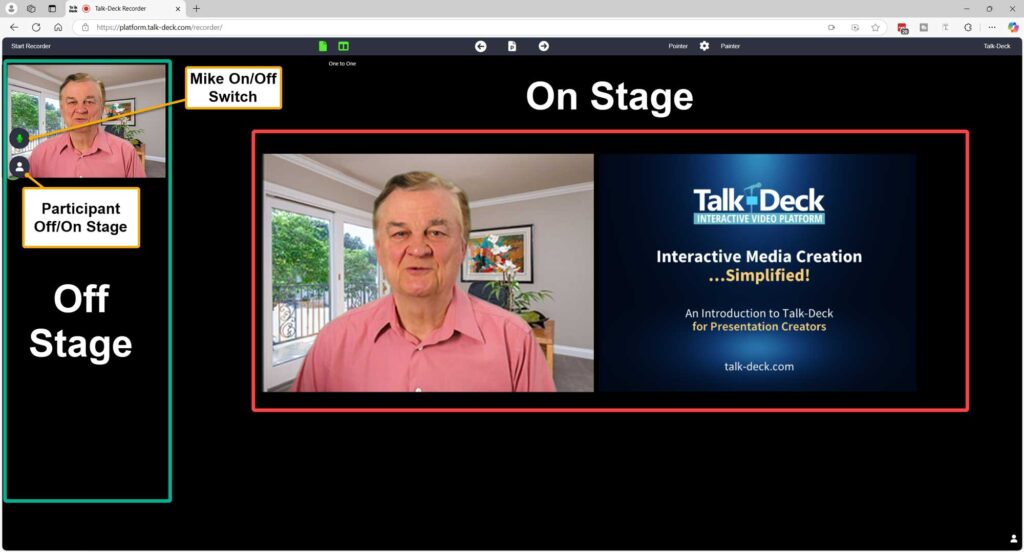
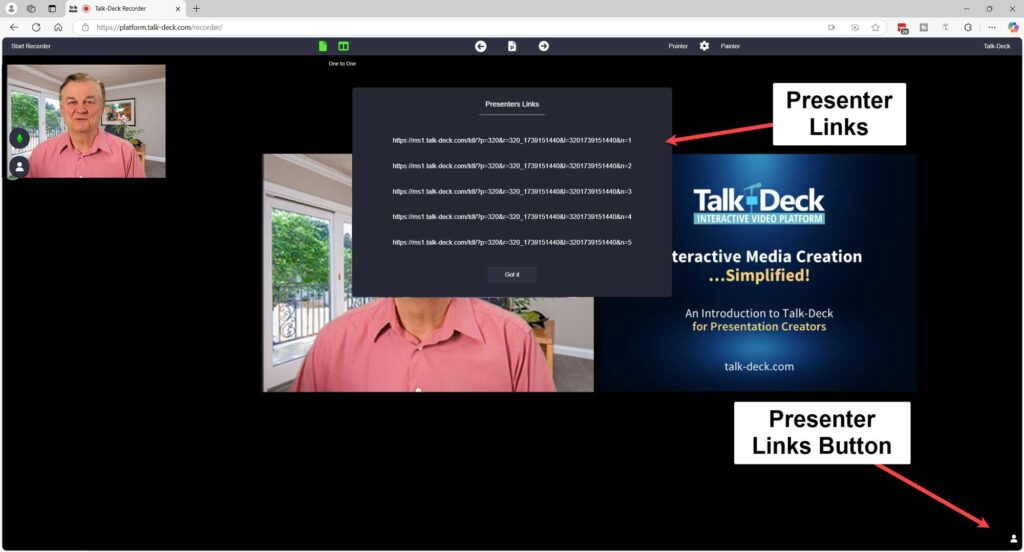
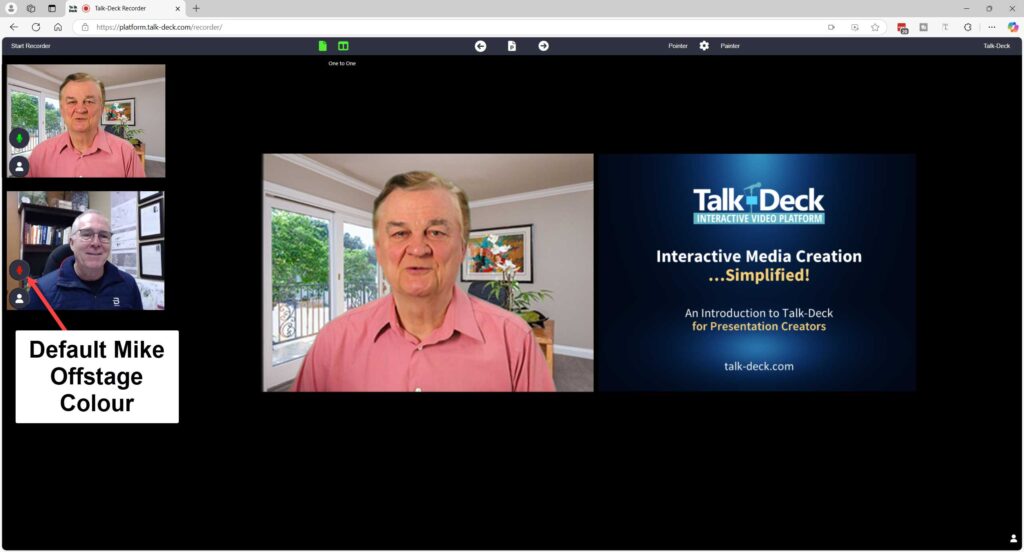
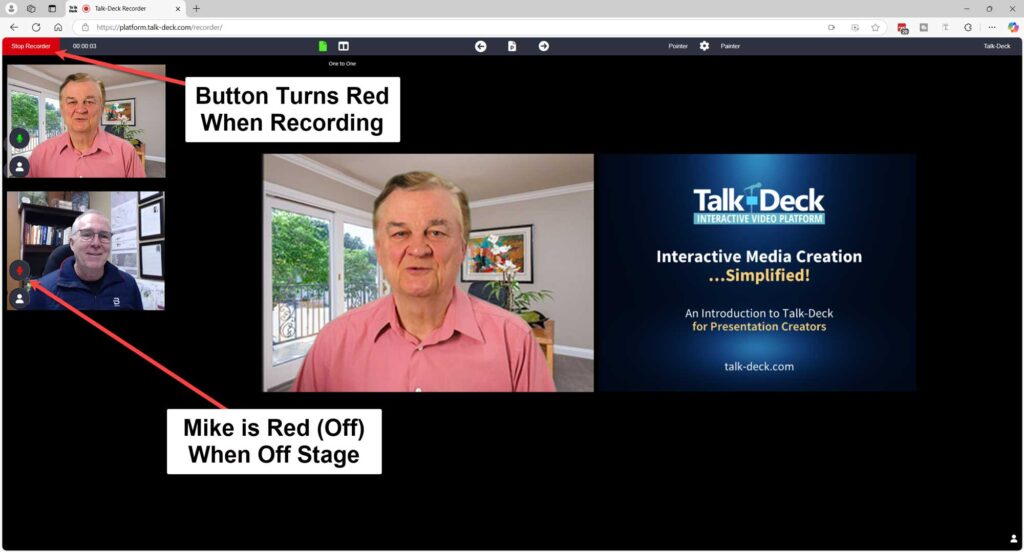
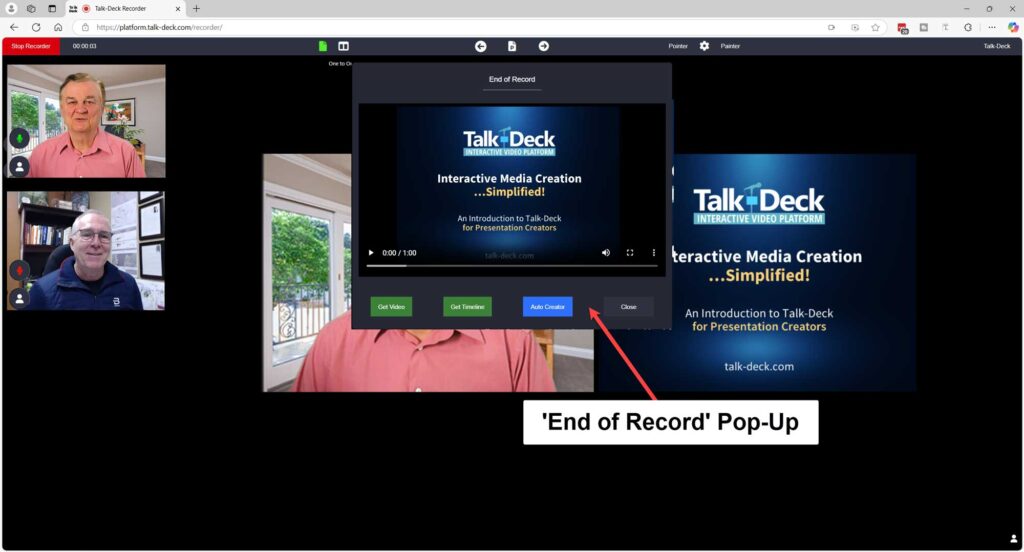
Recording Your Presentation
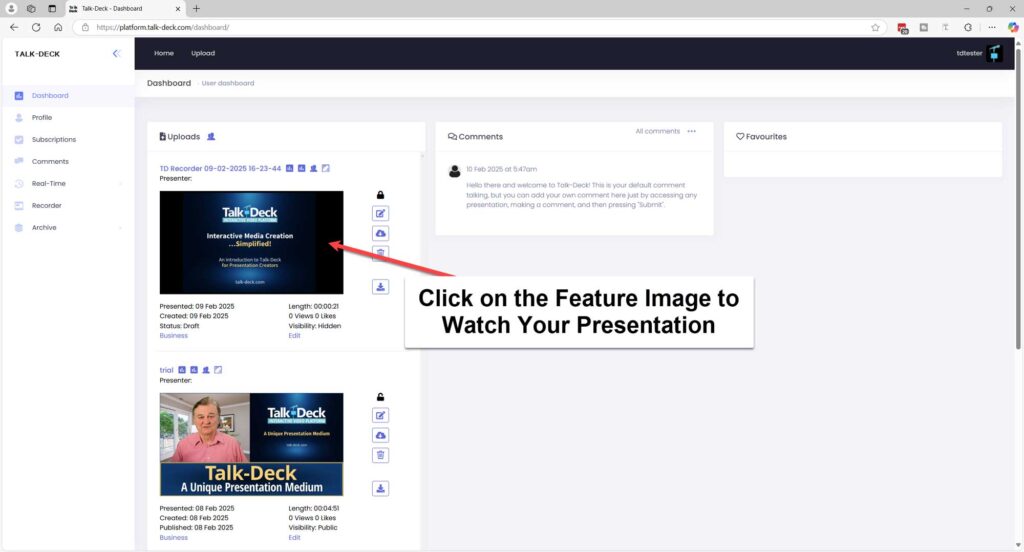
Watching Your Presentation

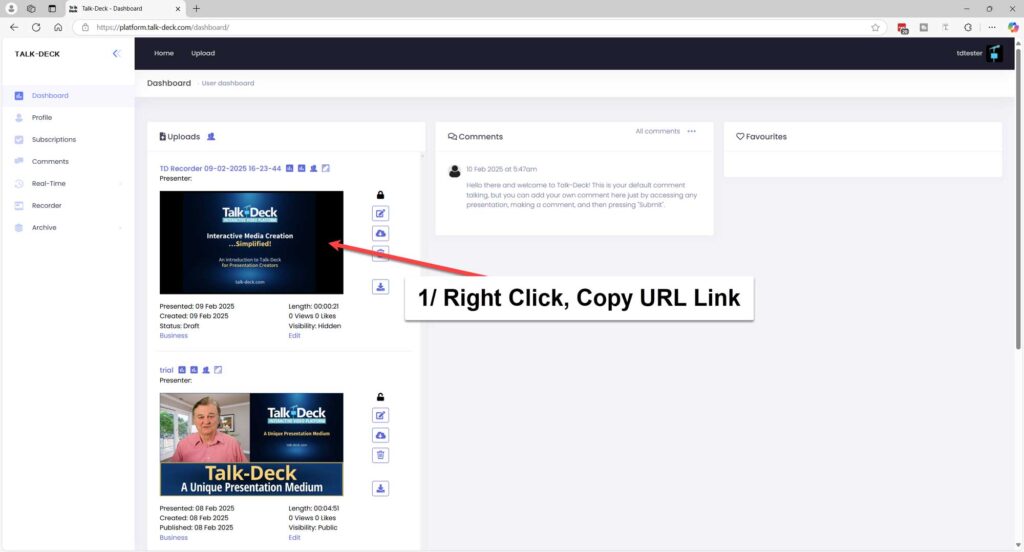
Sharing using the Direct Link Method


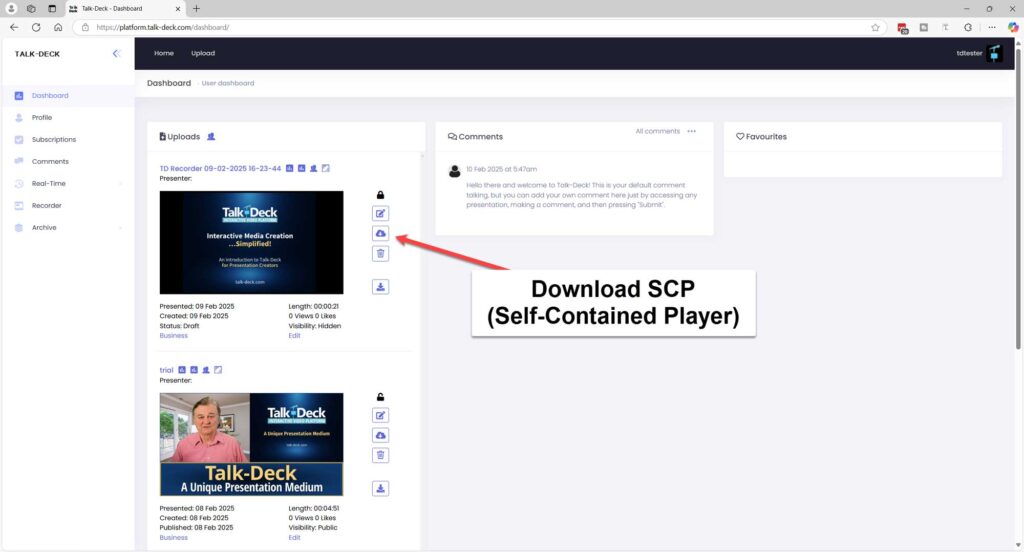
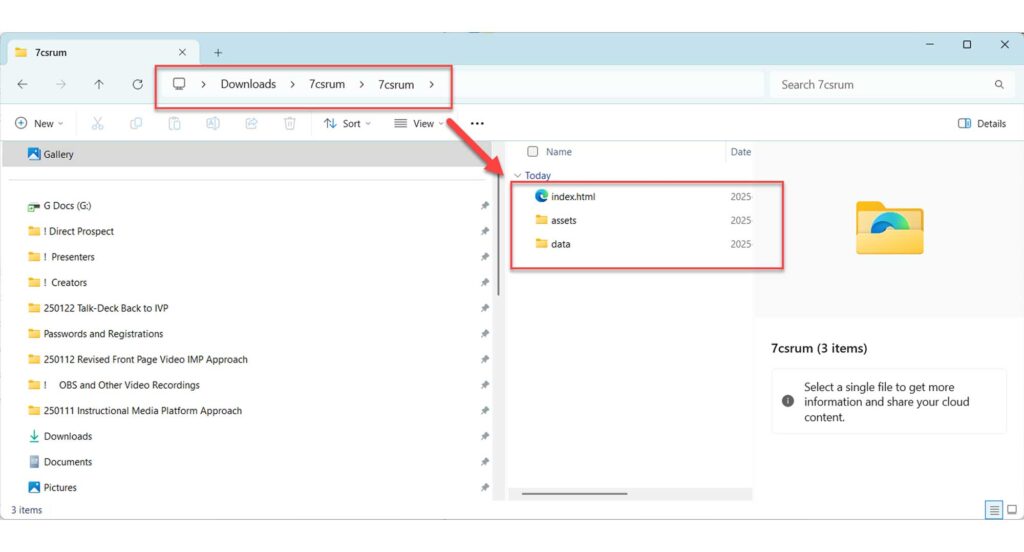
Sharing Your Presentation Using the Self-Contained Player (SCP)

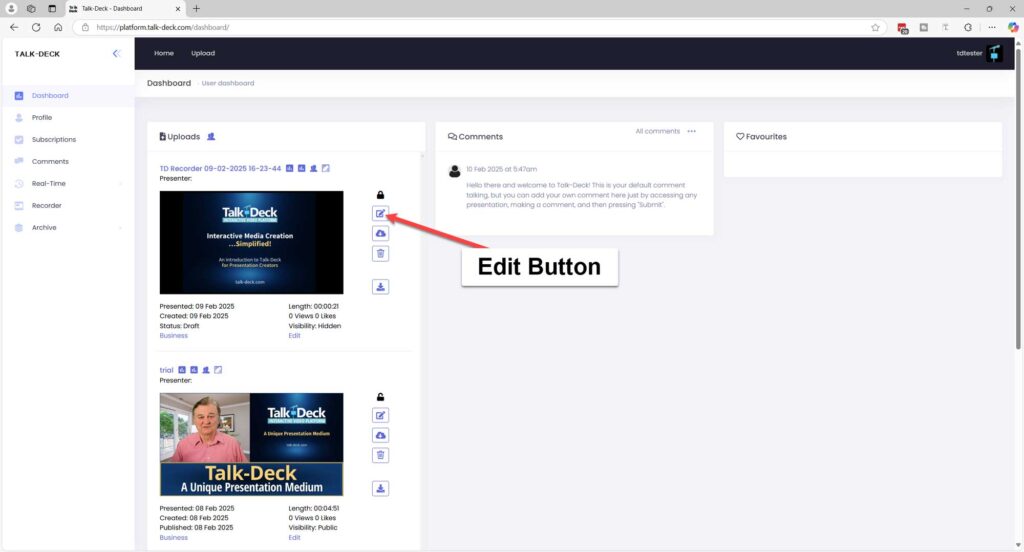
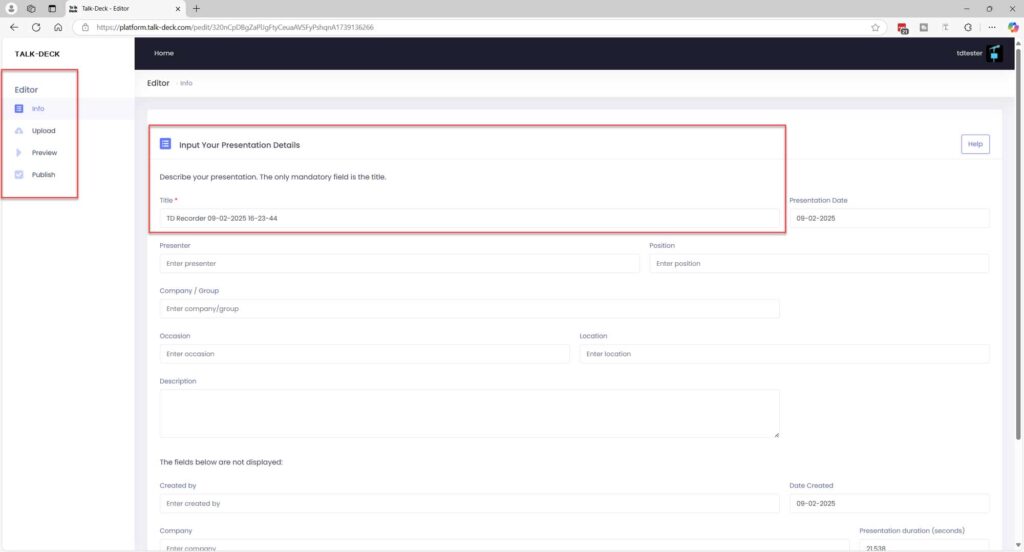
Revising Titles
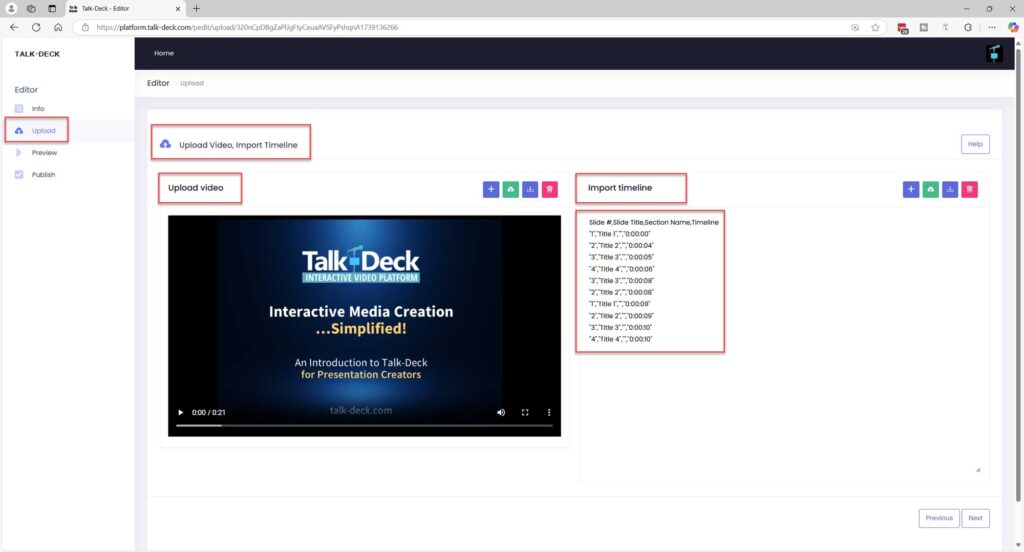
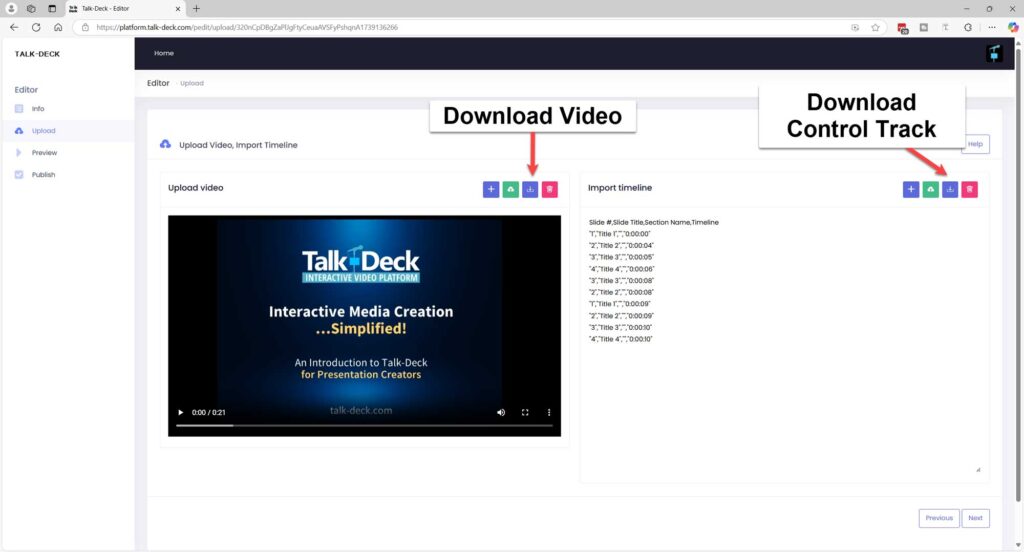
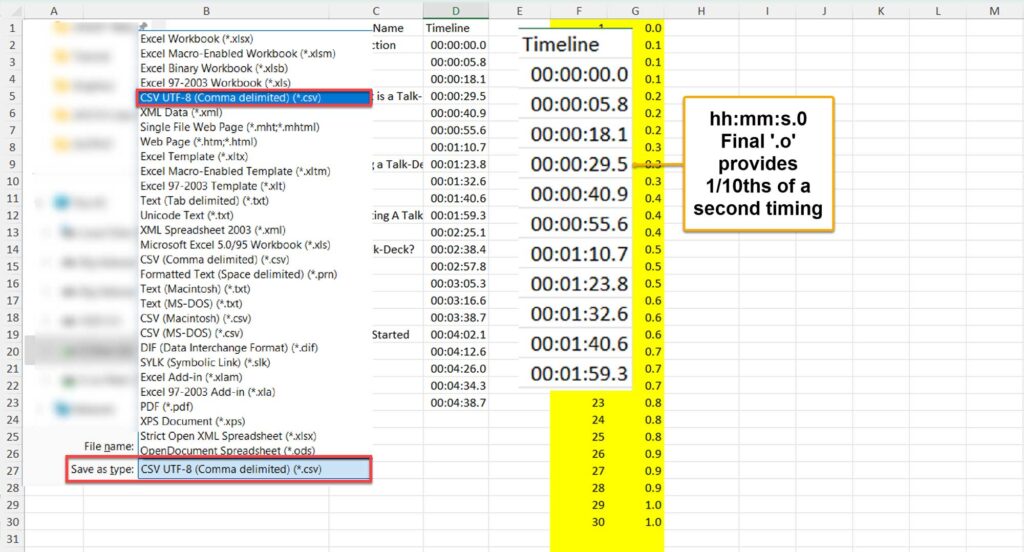
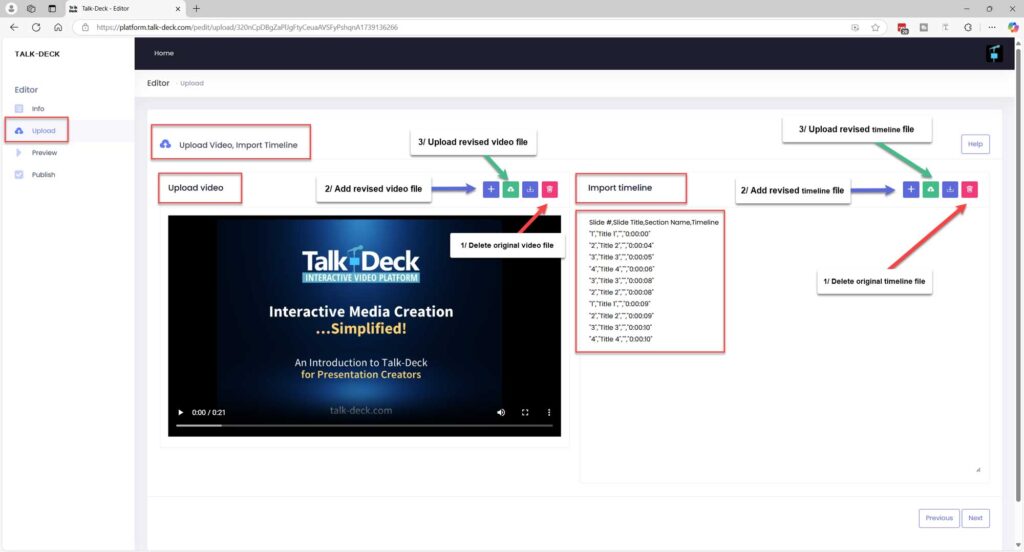
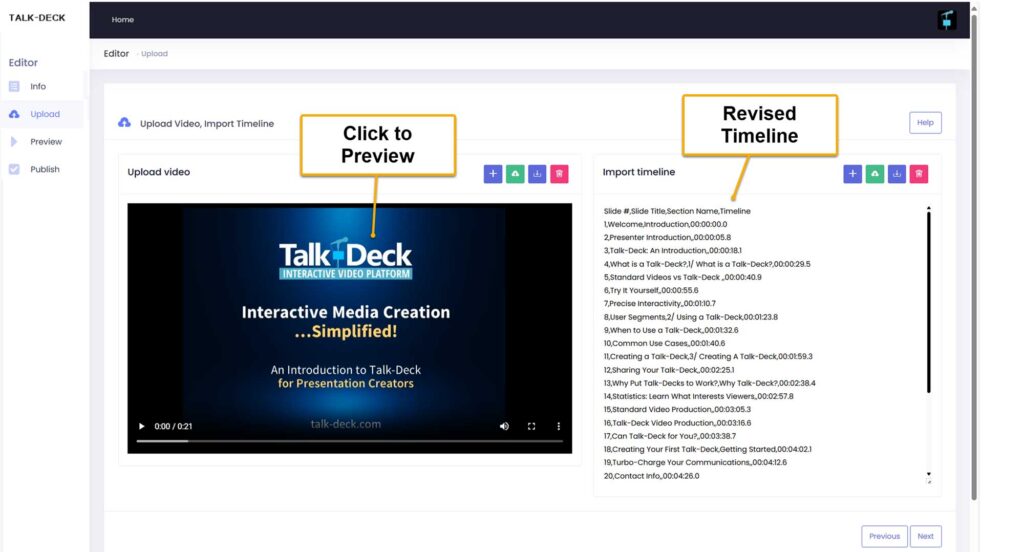
Revising the Video and/or Interactive Control Track

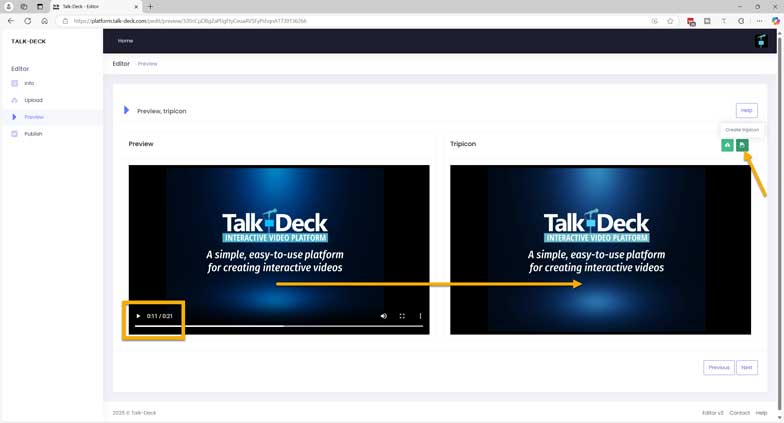
Previewing Your Presentation
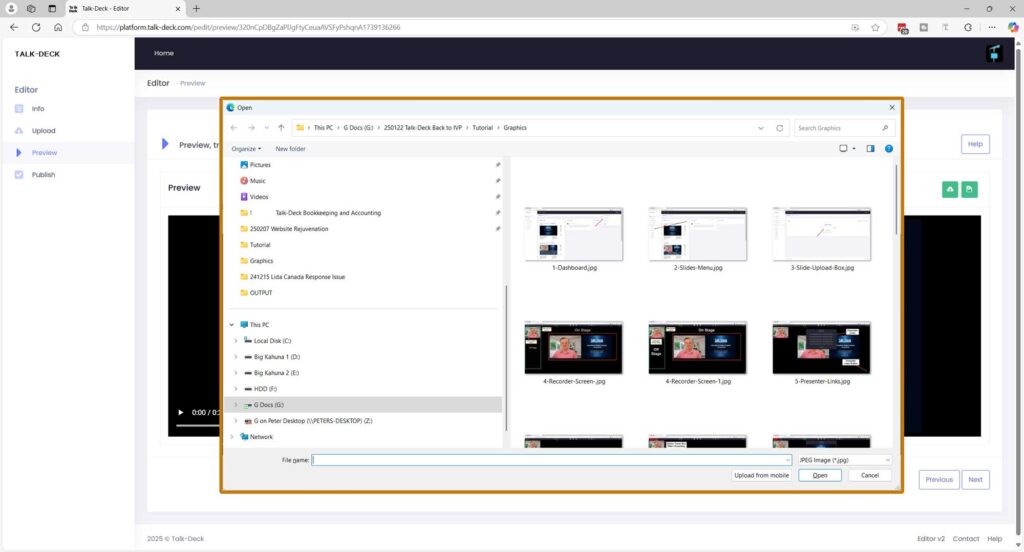
Using a Custom Feature Image in place of the Default Image
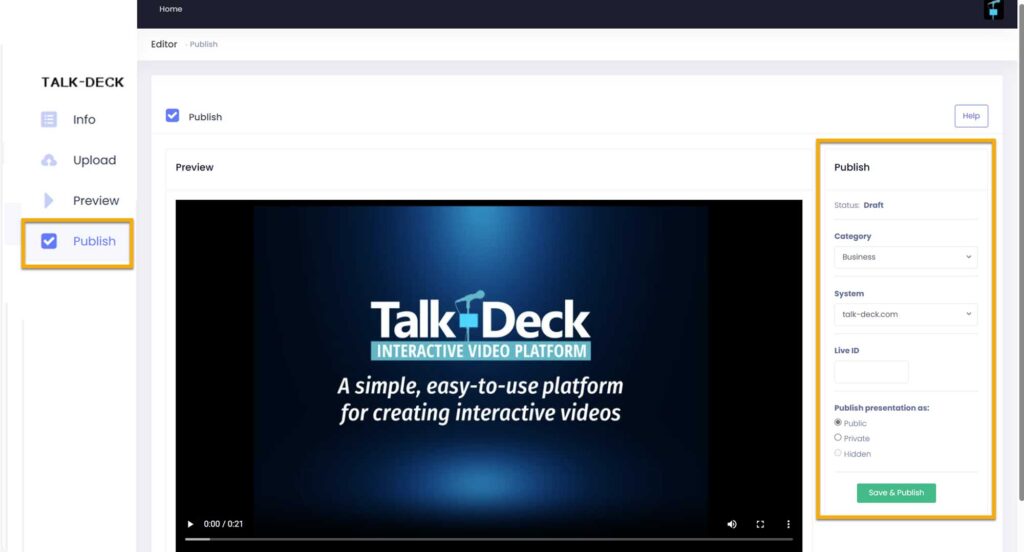
Publishing Your Presentation